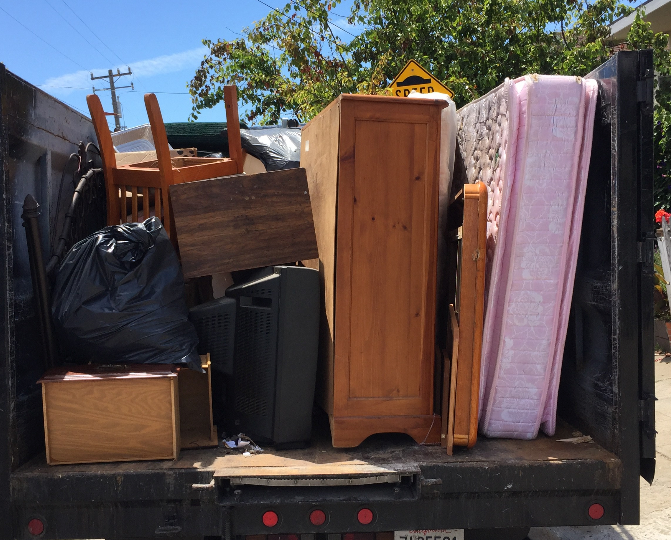
How to Prepare for a Junk Removal Appointment: A Comprehensive Checklist
Daniel Lee • September 9, 2024
Preparing for a junk removal appointment can make a significant difference in how smoothly the process goes. Whether you're clearing out old furniture, unwanted appliances, or general household clutter, a little preparation can help ensure that the junk removal team can do their job efficiently and effectively. Here’s a comprehensive checklist to help you get ready for your junk removal appointment.
1. Schedule and Confirm the Appointment
Before the junk removal team arrives, double-check the date and time of your appointment. Confirm the details with the service provider to ensure there are no misunderstandings or scheduling conflicts. Some services also offer online tracking or confirmation, so take advantage of these features if available.
2. Sort and Organize Your Items
Start by sorting through the items you want to be removed. Organize them into categories, such as furniture, appliances, electronics, and household goods. This will help the junk removal team quickly identify and handle each type of item, and it will make the process more efficient.
3. Clear the Pathways
Make sure the paths leading to the items you want to be removed are clear. Remove any obstacles, such as furniture, boxes, or other clutter, that might obstruct the junk removal team’s access. Ensure that walkways, doors, and hallways are accessible so the team can move items out of your home without difficulty.
4. Protect Your Property
If you have valuable or fragile items nearby, consider moving them to a safe area to avoid accidental damage. You might also want to cover floors or carpets with protective coverings to prevent any potential scratches or marks during the removal process.
5. Label or Separate Items
If you have specific items that you want to be handled in a particular way (e.g., items for donation, recycling, or disposal), label them or group them together. Communicate your preferences clearly to the junk removal team to ensure that items are disposed of or donated according to your wishes.
6. Remove Hazardous Materials
Certain items, such as batteries, paint, chemicals, or other hazardous materials, require special handling. Check with the junk removal service in advance to find out if they accept these types of items. If not, make alternative arrangements for their disposal according to local regulations.
7. Secure Important Documents and Valuables
Before the team arrives, make sure to secure any important documents, valuables, or sentimental items that you don’t want to be accidentally taken. Double-check drawers, closets, and other storage areas to ensure that nothing of personal value is mistakenly included in the removal.
8. Communicate Special Instructions
If there are any specific instructions or considerations for the junk removal team, such as tight spaces, delicate items, or any special handling requirements, make sure to communicate these details beforehand. Providing clear instructions helps ensure that the removal process goes smoothly.
9. Prepare for Payment and Documentation
Be prepared to handle payment and any necessary documentation once the job is complete. Confirm the accepted payment methods with the junk removal service and ensure that you have the required payment method available. If the service provides a receipt or invoice, make sure to review and keep it for your records.
10. Check for Additional Services
Some junk removal services offer additional services such as cleaning up after the removal, providing boxes for sorting, or assisting with heavy lifting. Check if these services are available and if they align with your needs. If so, make arrangements in advance to take advantage of any extra help.
11. Ensure Pets and Children are Safe
During the junk removal process, it’s a good idea to keep pets and children away from the work area. The presence of pets or young children might interfere with the team’s work or pose safety risks. Arrange for them to be in a different room or area during the removal process.
12. Double-Check the Job
Before the team leaves, do a final walkthrough of your home to ensure that all the items you wanted to be removed have been taken. If anything was missed or if you have any last-minute requests, let the team know before they finish up.
Conclusion
Proper preparation can make a world of difference in the efficiency and effectiveness of your junk removal appointment. By following this comprehensive checklist, you can ensure that the process is smooth, organized, and stress-free. With a little planning, you’ll be well on your way to enjoying a clutter-free space in no time.
Share
Tweet
Share
Mail
By Daniel Lee
•
September 9, 2024
Junk removal services offer a convenient solution for clearing out unwanted items from your home or business, but understanding the cost involved can help you budget more effectively and avoid any surprises. Here’s a detailed breakdown of the typical costs associated with junk removal and practical tips on how to save money during the process. Understanding Junk Removal Costs The cost of junk removal can vary widely depending on several factors. Here’s a look at the key elements that influence pricing: 1. Volume of Junk One of the primary factors affecting the cost of junk removal is the volume of items you need to have removed. Most junk removal services charge based on the amount of space your items take up in their truck. Prices are often quoted per cubic yard or by the load. The more junk you have, the higher the cost. 2. Type of Items The type of items you need removed can also impact the cost. Heavy or bulky items, such as furniture or appliances, may incur additional charges due to the extra labor and equipment required for removal. Similarly, items that require special handling, like hazardous materials, might come with extra fees. 3. Location and Accessibility The location of your property and the accessibility of the items being removed can affect the cost. If the junk is located in a hard-to-reach area, such as a basement or attic, the removal process may be more labor-intensive and costly. Additionally, if you live in a remote area or a location with limited access, transportation costs might be higher. 4. Labor and Time Some junk removal services include labor and time in their pricing structure. If the removal process is expected to take longer due to the complexity of the job or the need for additional workers, this can influence the overall cost. Ensure you understand what is included in the quoted price and any potential additional charges. 5. Disposal Fees Certain types of junk, especially large or hazardous items, may incur disposal fees. These fees cover the cost of properly disposing of or recycling the materials. Some junk removal services include these fees in their pricing, while others may charge them separately. Tips to Save Money on Junk Removal If you’re looking to keep costs down while using a junk removal service, consider these practical tips: 1. Declutter and Sort Beforehand Before the junk removal team arrives, take the time to declutter and sort through your items. By organizing your junk and removing items that are not suitable for removal (e.g., items that can be donated or recycled), you can reduce the volume and potentially lower the overall cost. 2. Compare Quotes Different junk removal companies may offer varying pricing structures and rates. Obtain quotes from multiple providers and compare their services and prices. Be sure to ask about any additional fees or charges that might apply. This will help you find the most cost-effective option for your needs. 3. Schedule During Off-Peak Times Some junk removal services offer discounted rates during off-peak times or slower seasons. If your schedule allows, consider scheduling your appointment during these times to take advantage of potential savings. 4. Opt for Partial Service If you only need a portion of your junk removed, inquire about partial service options. Some companies offer lower rates for removing specific items or smaller amounts of junk, which can help you save money if you only need a limited amount of removal. 5. Use Self-Serve Options Certain junk removal companies offer self-serve options where you load your junk into a designated container or truck, and the company handles the disposal. This can be a more affordable choice compared to full-service options where the company does all the work. 6. Explore Donation and Recycling Consider donating or recycling items that are still in good condition or can be repurposed. Many charities and recycling centers offer free pickup services or accept drop-offs, which can help reduce the amount of junk you need to be removed and potentially lower your overall costs. 7. Check for Promotions and Discounts Keep an eye out for promotions, discounts, or special offers from junk removal services. Some companies provide discounts for first-time customers, referrals, or bulk removals. Taking advantage of these offers can help you save money on your junk removal needs. 8. Negotiate Pricing Don’t hesitate to discuss pricing options and negotiate with the junk removal company. Depending on the volume and type of junk, there may be room for negotiation or flexibility in pricing. Open communication can sometimes lead to better deals or customized pricing. Conclusion Understanding the factors that influence the cost of junk removal and implementing strategies to save money can help you manage your budget while efficiently clearing out unwanted items. By preparing ahead of time, comparing quotes, and exploring cost-saving options, you can ensure a smooth and affordable junk removal experience.
By Daniel Lee
•
September 9, 2024
When it comes to decluttering your home or business, you might wonder whether to tackle the job yourself or enlist the help of a professional junk removal service. While DIY methods can seem cost-effective and straightforward, professional services offer a range of advantages that can make a significant difference. Here are the top 10 benefits of hiring a professional junk removal service, highlighting efficiency, safety, and eco-friendliness. 1. Efficiency and Speed One of the biggest advantages of professional junk removal is the efficiency and speed with which the job is completed. Professionals are equipped with the right tools and have the expertise to handle large volumes of junk quickly. This means you can clear out your space faster than if you were to do it yourself, allowing you to move on to other important tasks or enjoy your newly decluttered area sooner. 2. Proper Disposal and Recycling Professional junk removal services prioritize responsible disposal and recycling. They are familiar with local regulations regarding waste management and ensure that items are sorted and disposed of correctly. Many services have partnerships with recycling facilities and donate usable items to charity, helping reduce landfill waste and support environmental sustainability. 3. Safety and Risk Reduction Handling large or heavy items can pose significant safety risks. Professional junk removal teams are trained to lift and carry bulky items safely, minimizing the risk of injury to yourself or damage to your property. They also use specialized equipment to handle hazardous materials or items that require extra care, ensuring a safe and risk-free removal process. 4. Time and Labor Savings Junk removal can be a time-consuming and physically demanding task. By hiring professionals, you save yourself the time and effort required to sort, load, and transport items. This allows you to focus on more important activities or enjoy your free time without the hassle of junk removal tasks. 5. Expertise in Handling Various Items Professionals have extensive experience dealing with a wide range of items, from old furniture and appliances to yard waste and construction debris. Their expertise ensures that even the most challenging items are handled appropriately, and they know the best methods for disposal or recycling. 6. Cost-Effectiveness While it might seem that DIY junk removal is cheaper, hiring professionals can be more cost-effective in the long run. You avoid potential costs related to renting a truck, purchasing disposal fees, or dealing with potential damage to your property. Professional services often provide upfront pricing with no hidden fees, giving you peace of mind. 7. Enhanced Property Value A clutter-free space can significantly enhance the appeal and value of your property. Professional junk removal services help you achieve a clean and organized environment, making your home or business more attractive to potential buyers or tenants. This can be particularly valuable if you’re preparing your property for sale or lease. 8. Stress Reduction Managing junk removal on your own can be stressful and overwhelming, especially if you’re dealing with a large volume of items. Professional junk removal services take the burden off your shoulders, providing a streamlined and hassle-free process that reduces your stress and allows you to focus on other priorities. 9. Compliance with Regulations Professional junk removal services are knowledgeable about local regulations and guidelines related to waste disposal. They ensure that your junk is disposed of in compliance with all legal requirements, helping you avoid potential fines or penalties associated with improper disposal. 10. Convenience and Flexibility Many professional junk removal services offer flexible scheduling options to fit your needs. Whether you need a same-day service, weekend availability, or a specific appointment time, professionals can accommodate your schedule and provide the convenience of having junk removed at a time that works best for you. Conclusion While DIY junk removal might seem like a cost-saving option, the benefits of hiring a professional junk removal service far outweigh the potential savings. From enhanced efficiency and safety to eco-friendly practices and stress reduction, professional services provide a comprehensive solution that ensures a smooth and effective junk removal process. If you’re looking to clear out clutter quickly and responsibly, enlisting the help of experts is undoubtedly the way to go.
By Daniel Lee
•
August 16, 2024
Professional organizing has emerged as a vital service for individuals seeking to reclaim their spaces and manage their belongings effectively. It involves more than just tidying up; it’s about creating order, reducing stress, and enhancing the quality of life. This article explores the multifaceted impacts of professional organizing on homes and mental health, its role in junk removal and cleanup, and the benefits and considerations associated with the profession. What is Professional Organizing? Professional organizing is a service provided by trained experts who assist clients in decluttering, organizing, and streamlining their living or workspaces. Organizers use a combination of strategies and techniques to help individuals sort through their belongings, create effective storage solutions, and establish systems for maintaining order. The process often involves: Assessment: Evaluating the current state of the space and understanding the client's needs and goals. Decluttering: Assisting clients in deciding which items to keep, donate, or discard using a service like Rocky Mount Junk Removal. Organizing: Developing customized systems for storage and organization to maximize efficiency. Maintenance: Offering guidance on how to maintain organization over time. Impacts on the Home The effects of professional organizing on a home can be transformative: Enhanced Functionality: Organizing improves the functionality of spaces, making them more usable and efficient. This can be particularly beneficial in areas like kitchens, closets, and home offices, where organization directly impacts daily tasks. Increased Space: Effective organizing often results in better use of available space. By decluttering and implementing storage solutions, homes can feel larger and more open. Improved Aesthetics: A well-organized home is visually pleasing and creates a more harmonious living environment. It can elevate the overall ambiance and make the space more enjoyable to live in. Benefits to Mental Health The mental health benefits of professional organizing are significant and multifaceted: Reduced Stress: Clutter can contribute to feelings of anxiety and overwhelm. By creating an organized and orderly environment, individuals often experience a reduction in stress and an increased sense of calm. Enhanced Productivity: An organized space helps improve focus and efficiency. When items are easy to find and systems are in place, daily tasks become less time-consuming and frustrating. Boosted Mood: Living in a clean and organized environment can positively affect mood and overall well-being. It fosters a sense of accomplishment and satisfaction, which can improve mental health. Role in Junk Removal and Cleanup Professional organizers play a crucial role in junk removal and cleanup: Strategic Decluttering: Organizers help clients make informed decisions about what to keep and what to discard. This process is not just about removing items but doing so in a way that aligns with the client’s values and needs. Efficient Cleanup: Professional organizers can streamline the cleanup process by providing structured plans and organizing the logistics of disposal or donation. This ensures that junk removal is done efficiently and responsibly. Holistic Approach: Unlike traditional junk removal services that focus solely on physical removal, professional organizers address the emotional and psychological aspects of decluttering, offering a more comprehensive solution. The Profession: Benefits and Time Cost-Benefit The profession of professional organizing offers several benefits, both to clients and to those who pursue it as a career: Client Benefits: Time Savings: Clients benefit from the expertise and efficiency of professional organizers, saving time and effort in managing their spaces. Customized Solutions: Organizers provide personalized solutions tailored to individual needs, enhancing the effectiveness of the organizing process. Long-Term Impact: Professional organizing can lead to lasting changes in how clients manage their possessions and maintain order. Professional Benefits: Career Satisfaction: Organizers often find fulfillment in helping clients improve their lives and spaces. The positive feedback and transformation they witness can be highly rewarding. Growing Demand: As awareness of the benefits of organizing grows, so does the demand for professional organizers. This creates opportunities for career growth and specialization within the field. Flexibility: Many organizers have the flexibility to set their own schedules and work independently or as part of a team, allowing for a balanced work-life dynamic. Time Cost-Benefit: Initial Investment: The time and cost involved in hiring a professional organizer can be significant. However, this investment often pays off in the form of long-term benefits, including improved home functionality and mental well-being. Efficiency Gains: Professional organizing can lead to more efficient daily routines and reduced time spent searching for misplaced items, ultimately saving time and reducing frustration in the long run. Conclusion Professional organizing is more than just a service; it’s a transformative process that can significantly impact a person’s home and mental health. By addressing clutter, optimizing spaces, and creating effective systems, professional organizers help individuals achieve a sense of order and well-being. As the profession continues to grow, its benefits extend beyond the immediate effects of a clean and organized space, contributing to lasting improvements in productivity, mental health, and overall quality of life.
By Daniel Lee
•
August 16, 2024
Hoarding is a complex and often misunderstood issue that affects individuals, families, and communities in profound ways. At its core, hoarding is more than just an excessive accumulation of items; it's a mental health condition with significant emotional, social, and practical repercussions. This article aims to explore the nature of hoarding, its underlying causes, the impact on families and society, and strategies for effective cleanup and treatment. What is Hoarding? Hoarding is characterized by the persistent and excessive accumulation of items, often to the point where living spaces become cluttered and unusable. Individuals with hoarding disorder may collect a wide variety of objects, from newspapers and clothing to old electronics and food wrappers. This accumulation can lead to severe living conditions, creating hazards and disrupting daily life. Unlike casual collectors, those with hoarding disorder struggle with the inability to discard items, regardless of their actual value. This compulsion often stems from emotional or psychological needs rather than a genuine appreciation for the objects themselves. The Psychological Underpinnings Hoarding is recognized as a mental health condition and is often associated with various underlying psychological factors. These may include: Emotional Attachment: Many hoarders form strong emotional bonds with their possessions, viewing them as extensions of themselves or as symbols of past experiences. Fear of Losing Information: Some individuals hoard due to a fear of losing potentially valuable information or resources, even if they are outdated or irrelevant. Perfectionism and Control Issues: Hoarding can be linked to a desire for control or perfectionism, where the accumulation of items is a way to manage uncertainty or anxiety. Trauma and Loss: Past traumas, such as the loss of loved ones or significant life changes, can contribute to hoarding behaviors as a coping mechanism. The Impact on Homes and Families The effects of hoarding on homes and families can be severe and multifaceted: Health and Safety Hazards: Overstuffed homes can lead to dangerous living conditions, including increased risks of fire, mold, and infestations. The clutter can obstruct pathways and emergency exits, posing a threat to physical safety. Emotional Strain: Family members of hoarders often experience significant emotional distress. The clutter can create feelings of frustration, embarrassment, and helplessness. Relationships may suffer as a result of ongoing conflict and misunderstandings about the hoarder's behavior. Social Isolation: Hoarders may withdraw from social interactions due to embarrassment or the inability to host visitors in their cluttered homes. This isolation can exacerbate feelings of loneliness and depression. The Societal Impact Hoarding also affects society at large, influencing: Community Resources: In extreme cases, hoarding can strain community resources, including emergency services and sanitation efforts. The cleanup of severely hoarded properties can be costly and labor-intensive. Public Health: Hoarded properties may contribute to public health issues, such as pest infestations or environmental hazards, which can impact neighboring properties and communities. Economic Costs: The financial burden of cleaning up hoarded homes, combined with potential health risks and property damage, can be substantial. These costs can be borne by individuals, families, or local governments. Strategies for Cleanup and Treatment Addressing hoarding requires a multifaceted approach involving psychological support, practical cleanup strategies, and community resources: Professional Help: Therapy is crucial for addressing the underlying psychological issues related to hoarding. Cognitive-behavioral therapy (CBT) is often used to help individuals develop healthier attitudes toward possessions and improve decision-making skills. Organizational Support: Professional organizers and cleanup specialists like Rocky Mount Junk Removal can assist in decluttering and organizing living spaces. These professionals often work with the hoarder to sort through items and create functional living environments. Family Involvement: Support from family members is essential. This includes offering emotional support, understanding the complexities of hoarding, and encouraging treatment and intervention. Community Resources: Local community organizations and social services may provide additional resources and support for individuals struggling with hoarding. Cleanup Hoarding presents a unique challenge for junk removal services due to the overwhelming volume and emotional attachment clients often have with their belongings. Unlike typical clutter, hoarded spaces require a delicate balance of empathy and efficiency. Professional junk removal teams specializing in hoarding situations not only need to manage the sheer scale of items but also navigate the psychological barriers that prevent clients from discarding possessions. These services must approach each job with sensitivity, providing support and guidance to help individuals make decisions about their items while ensuring that the removal process is conducted safely and effectively. By addressing both the practical and emotional aspects of hoarding, these specialized services play a crucial role in restoring order and improving the quality of life for affected individuals. Conclusion Hoarding is a serious mental health condition that affects many aspects of life. Understanding its causes, impacts, and the best approaches to treatment can help mitigate its effects on individuals, families, and society. With compassion, professional support, and effective strategies, it is possible to address hoarding and improve the quality of life for those affected.
Get in touch with us
At Rocky Mount Junk Removal, we’re committed to providing fast, reliable, and eco-friendly junk removal solutions. From clearing out clutter to handling major clean-ups, our professional team is here to assist. Reach out today for a hassle-free quote and experience a cleaner, greener space with our expert services!
QUICK LINKS
COMPANY INFO
